As promised, I am posting a tutorial on stitching. I love this technique because it adds something special to your layout and you do not have to have sewing skills to accomplish it! Do not be intimidated by sewing - it is
sew easy! And most of all - it is way cheaper than those papers on the market with sewing already on them!
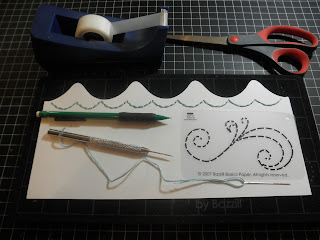
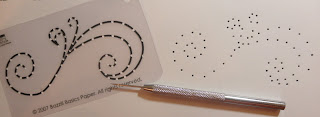
We will keep it simple today with some basic stitching applications using a simple straight stitch. First, though, let's talk about tools. What will you need to stitch on your paper? Several companies offer special tools for stitching, including In Stitch'z by Bazzill. The basic needs for this technique include: A
piercing mat, a
piercing tool, a
piercing template (particularly if you are a beginner), scissors, pencil, needle, embroidery floss and regular scotch tape. You can purchase "paper stitching needles and floss" from a scrapbook supply vendor, however it will be far cheaper and you'll find a broader assortment of colors if you walk down the embroidery aisle at your local sewing/craft store! The needles you choose should have eyes big enough to thread the full 6 strands of embroidery floss.
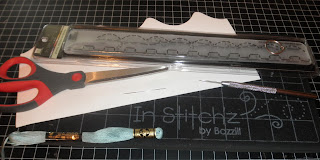 |
| Basic stitching tools |
First thing is to decide what pattern you are going to stitch on, and where you are going to stitch it. I've chosen to stitch a scallop pattern to mimic the scallops of the paper scrap I have. To begin, set out your piercing mat. Select your template and grab your paper piercer (which from here on out I will refer to as a "piercer").
Line up the template on the paper (facing right side up) where you want the design. You do
not need to tape it down or otherwise affix it.
 |
| Placing the template |
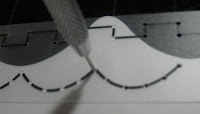
Firmly hold the template in place with your non-dominent hand and grab your piercer with your dominent hand. Put the piercer in the hole and press through. Gently remove. Continue until you have finished piercing your design. Before you remove the template, double check to make sure you haven't missed any needed holes.
 |
| Piercing the paper |
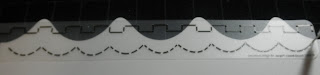
 |
| Finished piercing |
Next, it is good practice to flip the paper over and "connect the dots" with your pencil using a light touch. With a simple design such as this scallop, it may seem silly. But, when you have a design where lines criss-cross, it is easy to get lost when you start stitching and having the lines on the back to follow can be a lifesaver.
Next, thread your needle with your embroidery floss. I suggest using no more than 2 feet (approximately 66 cm) of floss at a time, otherwise it will knot up like crazy. It is easy to keep adding floss when you run out. If you want a delicate detail use fewer strands of floss. Personally I like using all six strands for the punch of color. Do not knot the floss.
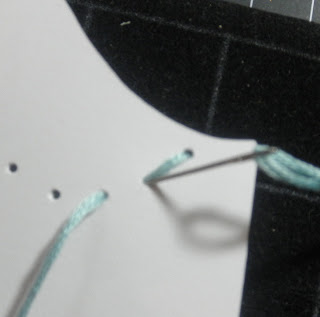
From the back of the paper, push the threaded needle through, leaving about 1 inch of floss on the back side of the paper. Using a small piece of scotch tape, affix one end of the floss to the back side of the paper. More like cross stitching and less like sewing, we will only be using one thickness of the floss.
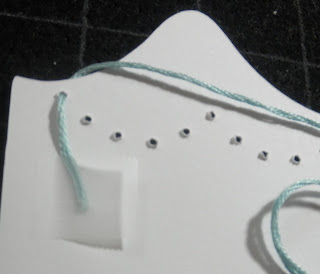 |
| Tape of the end on the backside to begin |
On the front side of the paper, pull the floss taut and thread the needle through the next hole. From the back, pull the needle taut and thread through the next hole. When you flip the paper to the front, it will look like a space has been missed. Thread the needle through the previous hole to make a solid line. From the back side, press the needle through the next empty hole and pull through to the front, keeping your floss taut against the paper (but not so tight to tear the paper). From this point on you will be doing the same action of back tracking to create a solid line.
 |
| Backtracking the stitch to create a solid line, from the front |
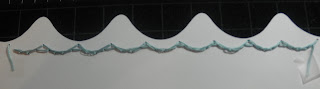
Continue stitching until you get to the end of your design. If you run low on floss, merely tape off the end of the floss you are using to the back of the paper, re-thread your needle, and keep going. When you finish it should look some like this:
 |
| Taping off end |
 |
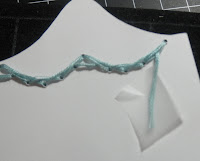
| Backside of stitching |
 |
| Finished stitching |
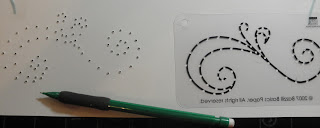
OK, now that wasn't so bad, was it? Simple, huh? Let's step it up, and chose a slightly more complicated template - but one that is great to use on layouts - a flourish! You will definitely want to use your pencil to connect the dots on the back for this one.
 |
| Piercing a flourish |
Decide where you want your flourish, place the template and hold firm while you pierce the paper. Note, you can pierce and sew through layers of paper, so this technique can be used afer you've got everything placed on your layout.
 |
| Finished piercing of the flourish |
As I mentioned before, this template has many converging lines and it is easy to get lost as to where your next stitch should be. Flip your paper over, and flip your template over. Using your pencil, lightly trace the dot-to-dots, matching the template.
 |
| Flip the paper and the template over |
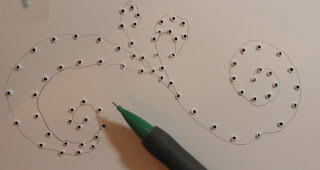 |
| Lightly connect the dots, matching the template |
Using the same stitching technique above, stitch your flourish. You can see where the various ends of floss have been taped down, as I ran out of floss in the pattern. It looks a mess on the back.
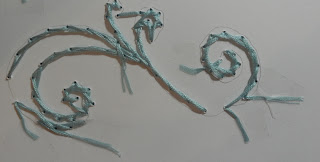 |
| Backside of the stitched flourish |
But, we don't see the back on the finished product! Stitched flourishes are beautiful and even more so when you add a flower to them.
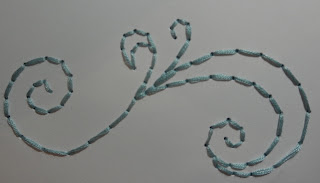 |
| Finished flourish |
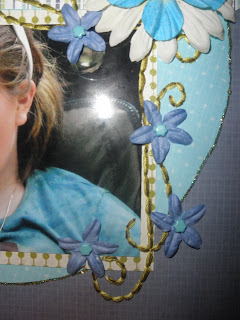 |
| Flourish with flowers added, for a vine effect |
One more thing I want to show you...to get your creative juices flowing... is combining a scrapbook design with a stitched design. I cut a yellow circle and affixed it to my paper. I pierced sunbeams around the circle, using nothing but my imagination as a template. Then I connected the dots of the sunbeams on the back. It may be easier to trace your sunbeams on the back first, then pierce, whatever works for you!
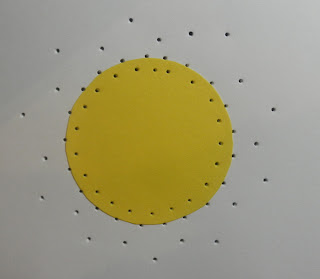 |
| Circle affixed, free-hand sunbeams pierced |
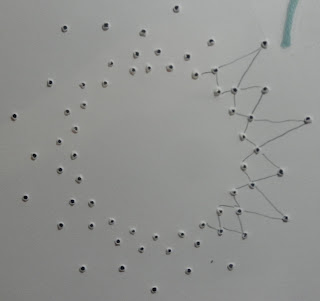 |
| Connect the dots for the sunbeams on the backside |
And, ta da! Isn't this a great way to add sunshine to a spring or summer layout?!
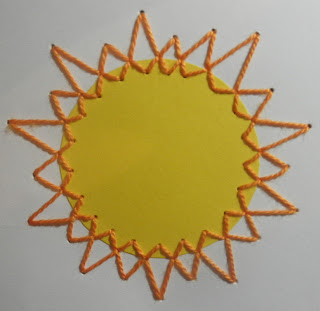 |
| A sunny embellishment! |
I hope you've enjoyed this stitching tutorial and are inspired to try it. It looks far more daunting than it is, and the compliments you'll get are worth it!
Don't forget to check back - I'll be posting a tutorial on using Glimmer Mist! Until next time - go crop yourself!


Hello!!!
ReplyDeleteIt's a wonderful idea to made a blog! I will come to you again when I will have much time to read all...because it's take more time for me...you know why...
I'm happy to see you here, see you soon!
kiss
Sandra from France.
luv the step by step specially how to add a bit of stitching for added visual weight.
ReplyDeleteMaggie